Townk's Keymap
Trying to take care of an enjury on my arm I borrow an ergonomic keyboard from a frient (Kinesis Advantage).
I really enjoyed my time with it but there were some anoyancies:
- The curvature on the keys bothered me since I'm a Vim user and using the motion keys on my editor was awkard.
- I had to spend too much time remapping the keyboard to make some symbol keys more accessible to me.
- The fact that my hands had to stay close to each other was a bit stressfull to my sholders.
After a long research I find out that Ergodox EZ would be perfect for my needs and purchase one. Before the keyboard even got in my hands I started to think on the layout I would use on it and soon enough I planed couple adjustments from the Kinesis I was using so far.
The layout
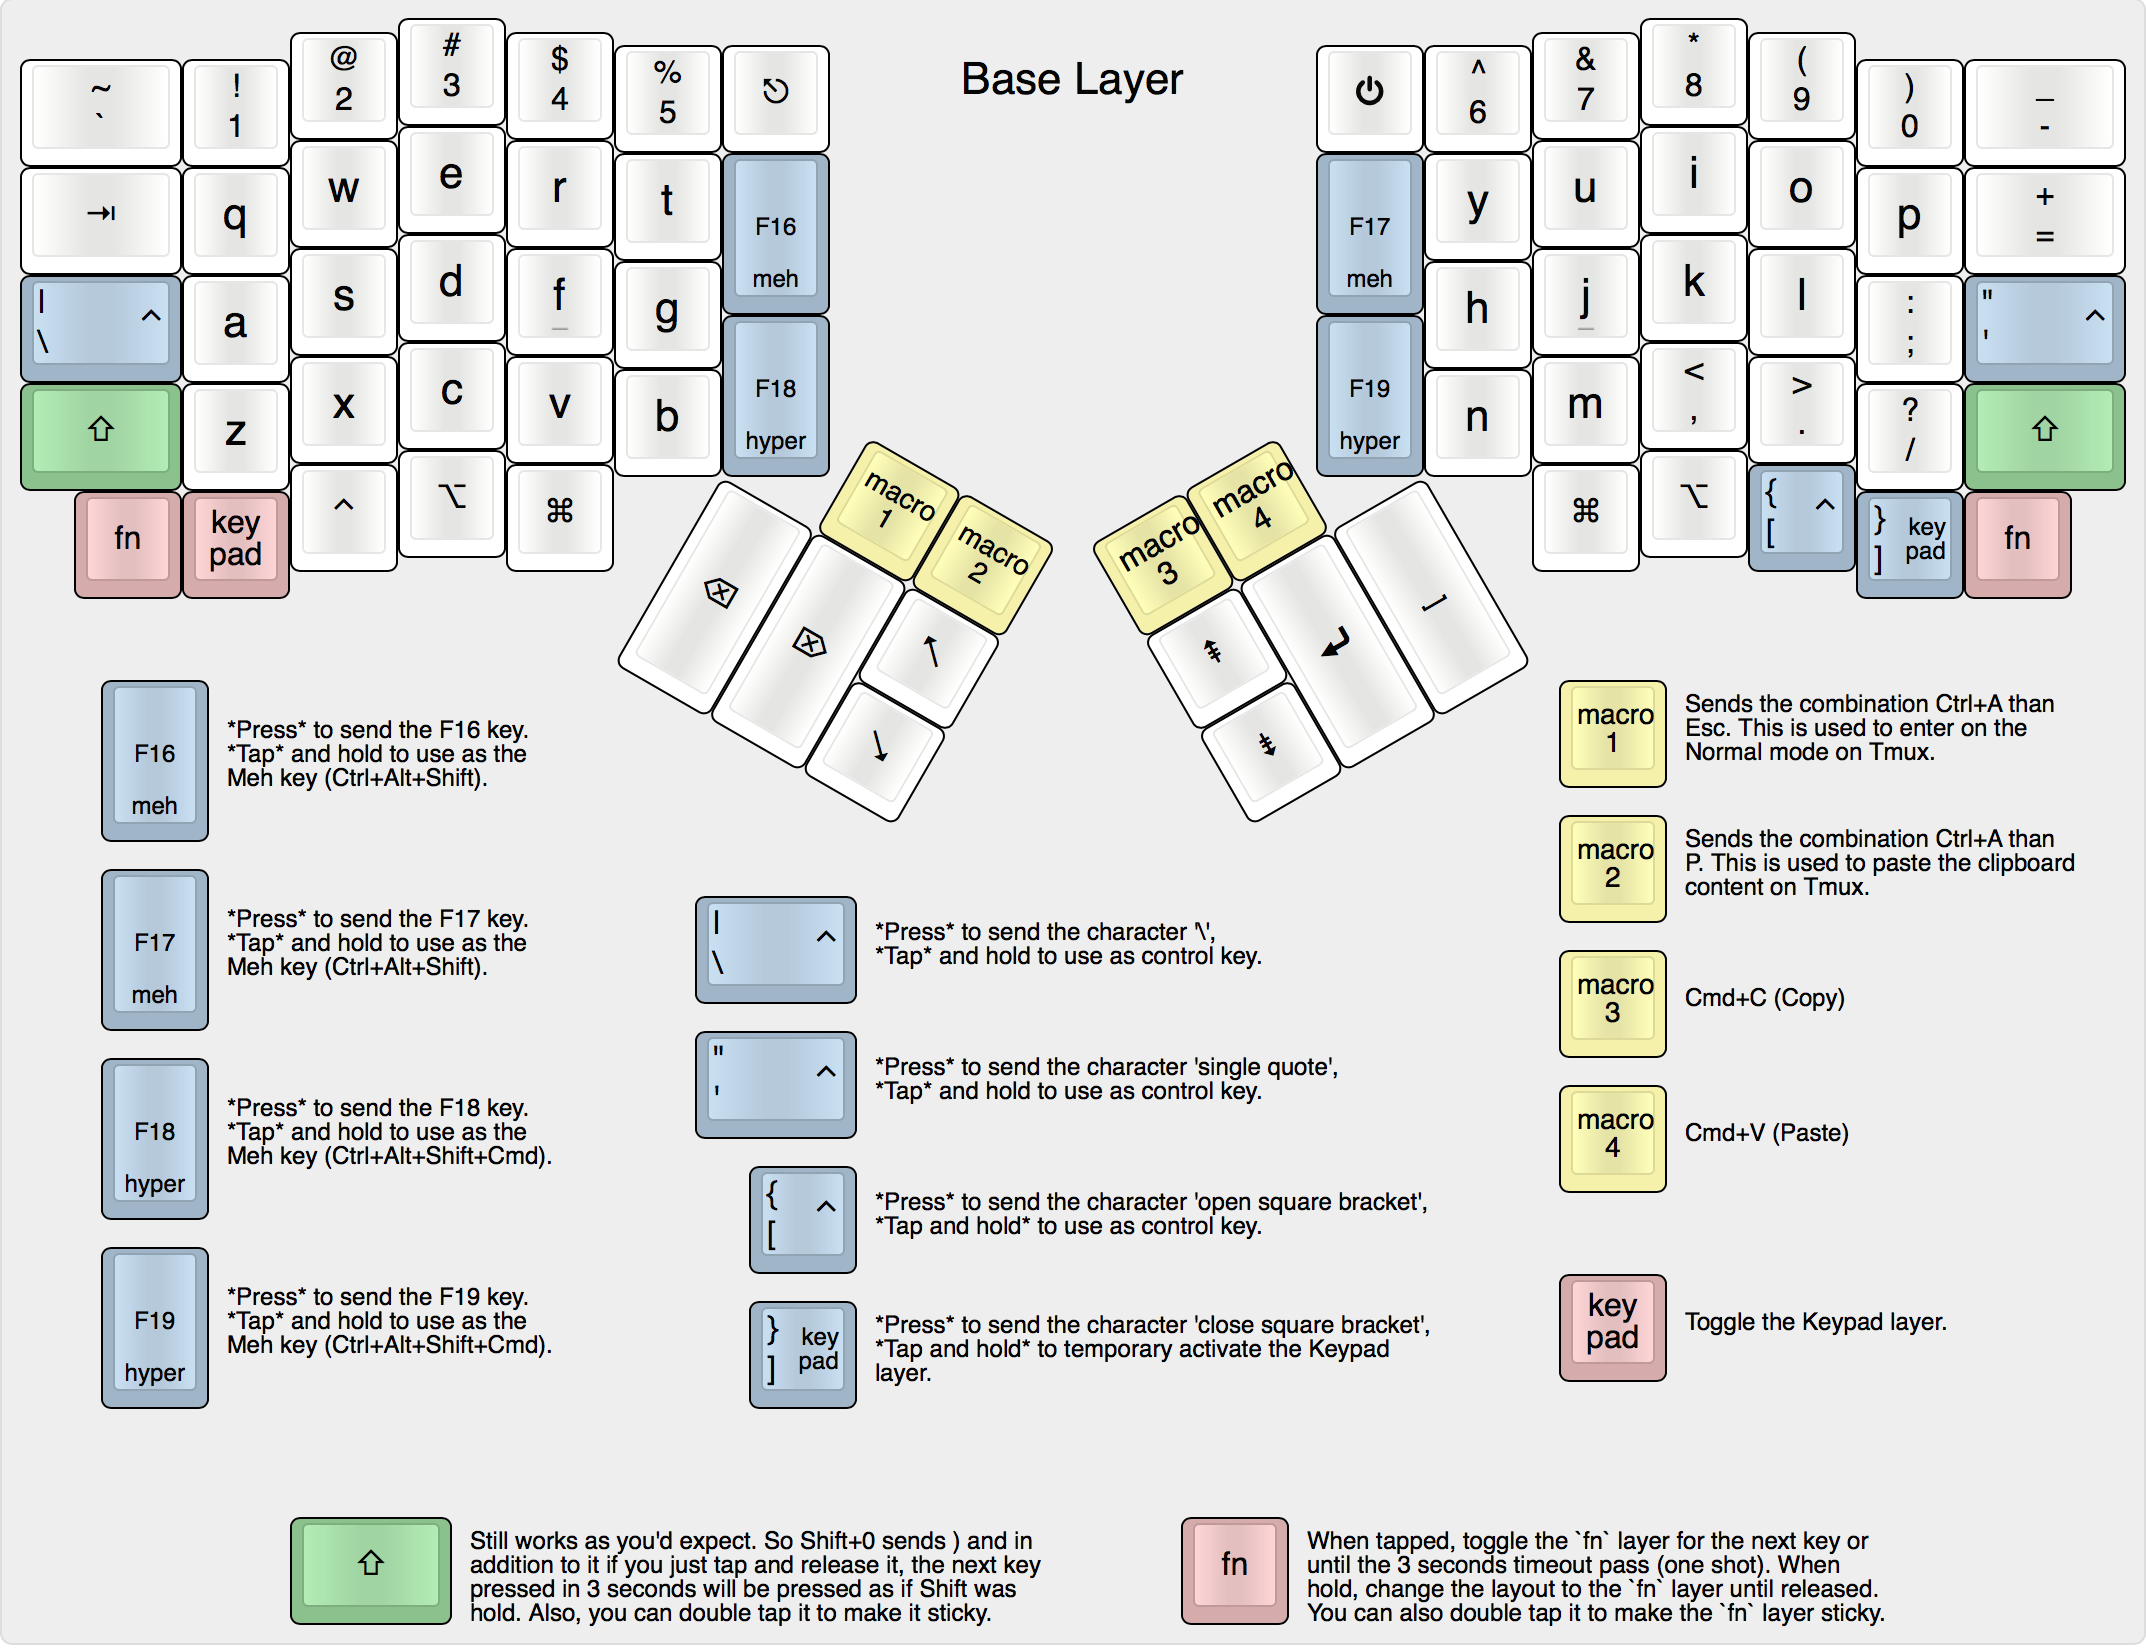
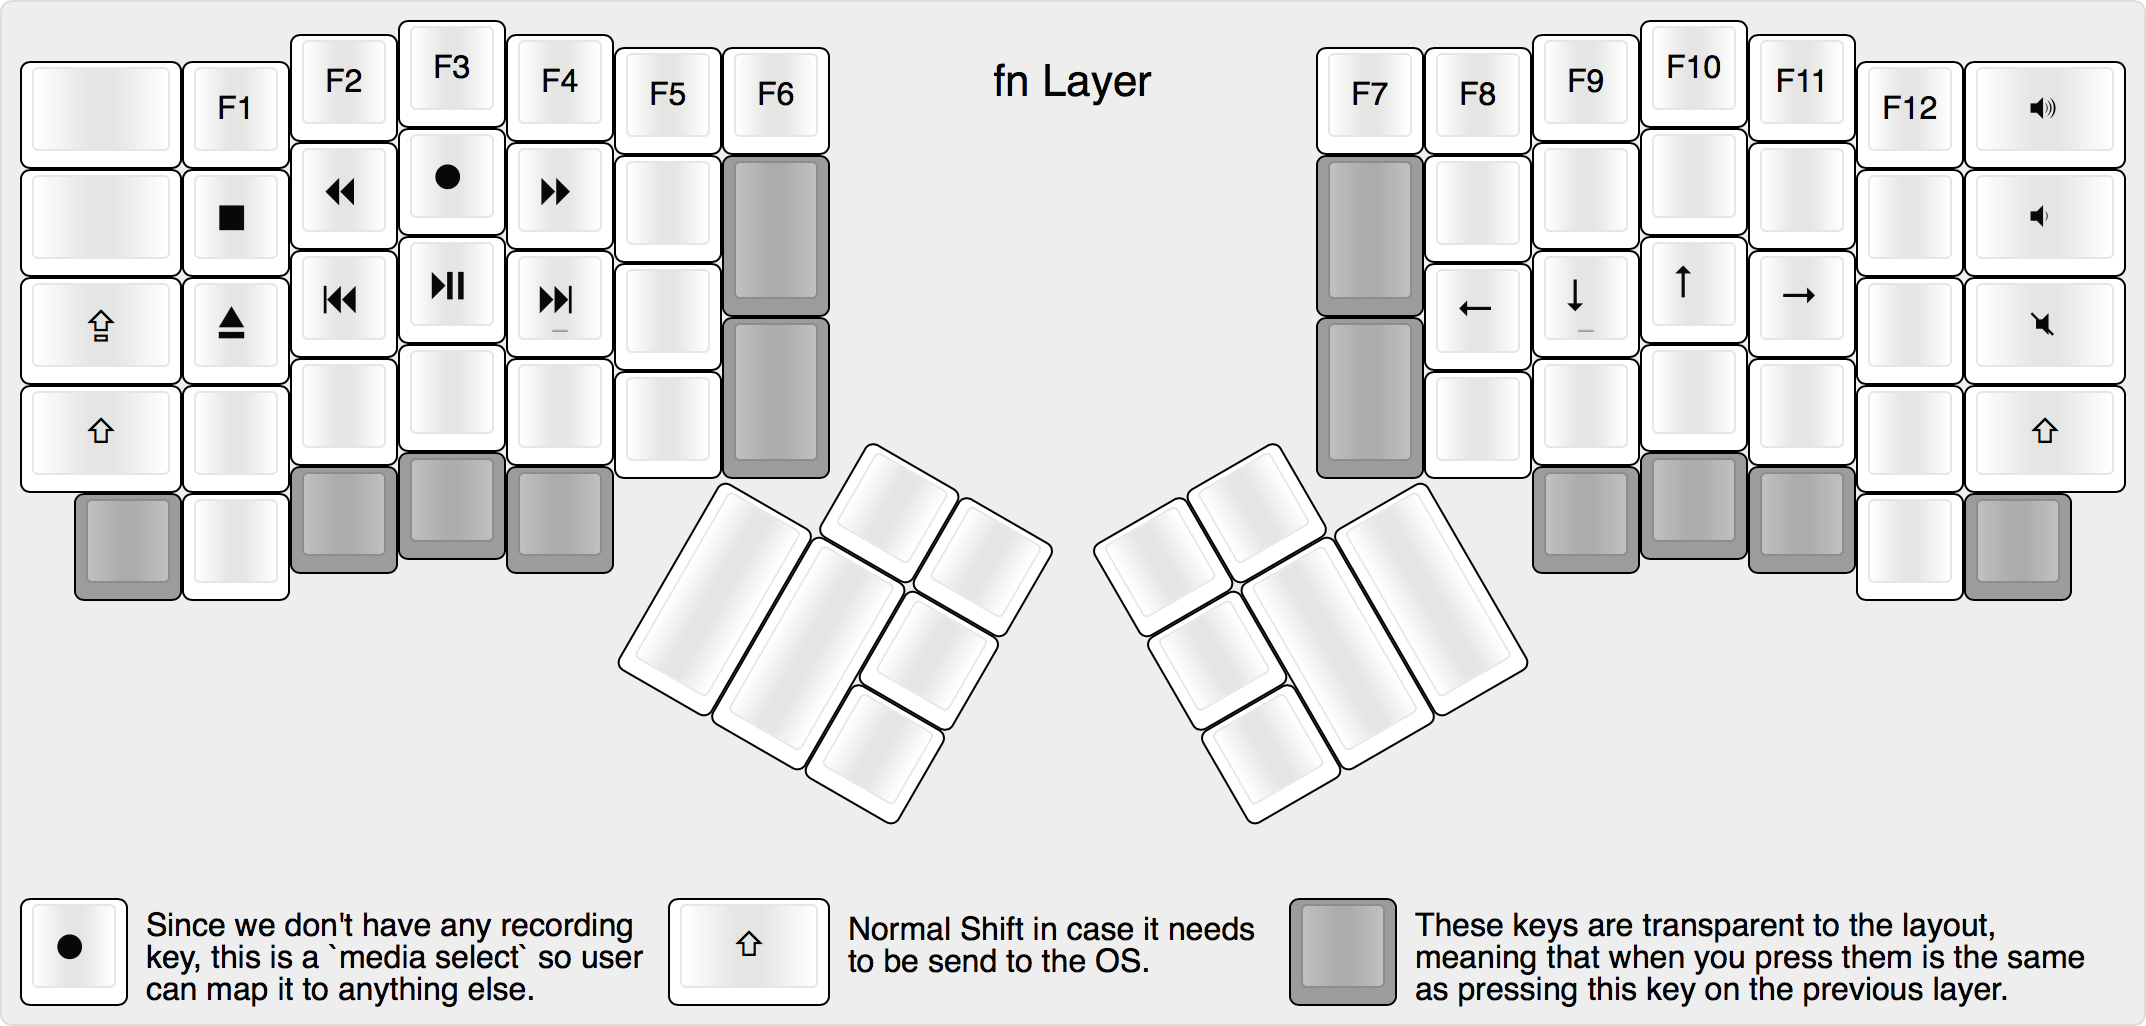
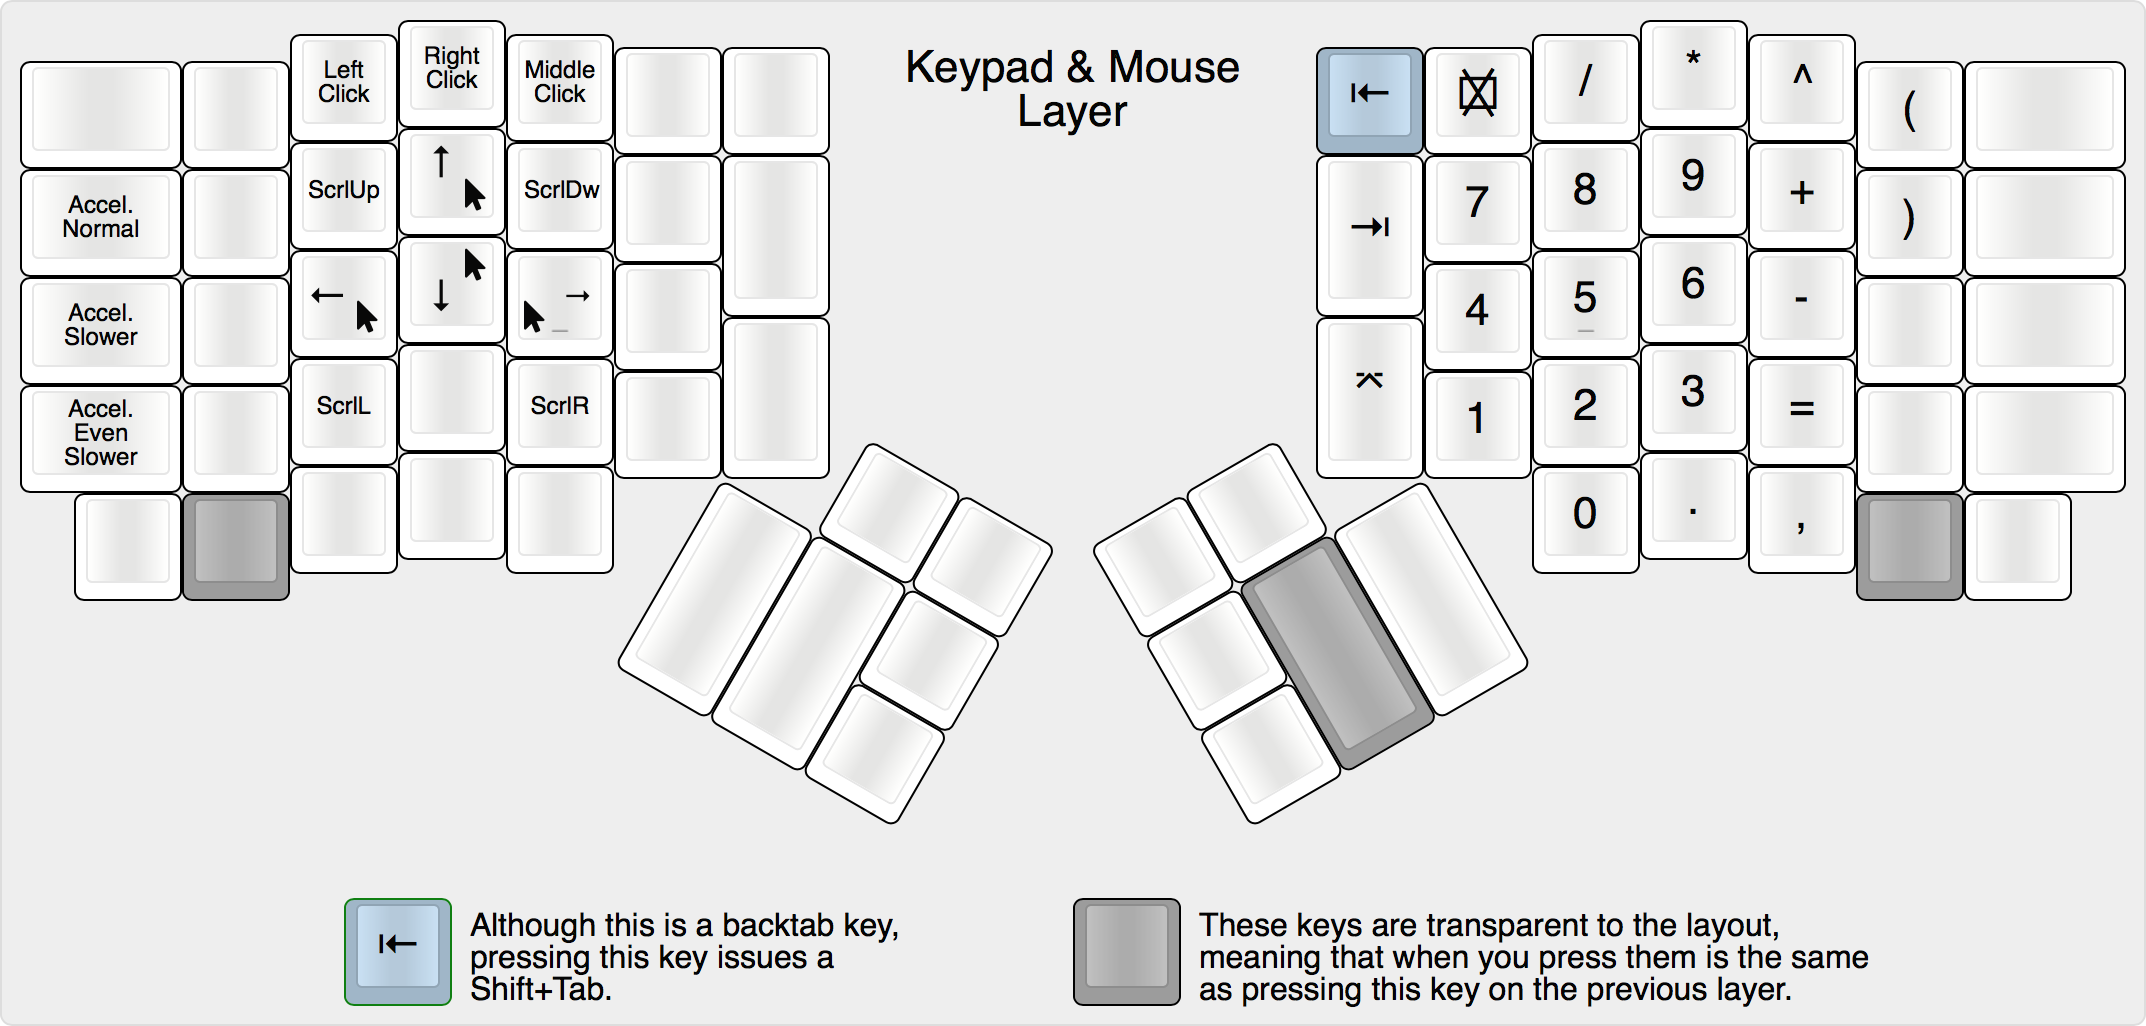
Here are the layout mapping in images so you can have a glimpse on it:
Notice that, differently from the default behavior, my layer keys are not transparent by default, which means that if you press any non-labeled white key, nothing will be handled to the OS.
One shot keys
It all started with the access to the function keys (F1, F2, F3...), since those keys are located on a different layer I needed a way to press them with minimal effort without disrupting my flow.
For me, togglihg a layer to press a button and than toggle it back is a waste of time (although I admit it's a single tap from what I have), so I decided to do it as a one shot key. I could press it and the next pressed key would be handled by the target layer which just after it delivers the key to the OS it would get back to the previous layer.
After setting up my layout to do just that I realized that occasionally I would stop myseld on the middle of the process and the one shot layer would be still triggered until I press any other key. So to prevent me from tapping keys I don't want I added a timeout of 3 seconds for the one shot actions.
Ultimately I tested the shift key as a one shot one and really like it, so here you have it, all the one shot keys on my layout.
Glossary
If you're not familiar with the Mac symbols used on some keys, here is a reference to them:
| Symbol | Description |
|---|---|
| ⌘ | Command |
| ⇪ | Caps Lock |
| ⇧ | Shift |
| ⌥ | Option (alt) |
| ⎋ | Esc |
| ⇥ | Tab forward |
| ⇤ | Tab backward |
| ⌃ | Control |
| ␣ | Space |
| ⌫ | Backspace |
| ⌦ | Delete |
| ⏎ | Enter |
| ⌤ | Return |
| ⌽ | Power on/off button |
| ↖ | Home |
| ↘ | End |
| ⇞ | Page up |
| ⇟ | Page down |
| ⌧ | Clear |


